I recently got one of my Nikon Z6II's converted to Astro by Spencers Camera in Utah. They have a unique astro conversion in that it's Visible Light + Ha (red). Which for me, with primarily doing single image Milky Way images compared to what seems to be the normal for the Milky Way now where they are all composite images, with the Milky Way being captured with an astro converted camera and a separate Ha filter and on a tracker to take multiple images to stack.
While I can do that, I prefer to stick mainly to just single images that I then use in my timelapses. What I was hoping with the Visible Light + Ha conversion by Spencers was to just get a little extra pizzaz in my Milky Way timelapses.
I have done research and contemplated this for almost a year, and I finally pulled the trigger a month ago. One thing I will say is that Spencers Camera seems to have done a great job, they were quick and easy to deal with. They are located just south of Salt Lake City, so I actually dropped the camera off and then picked it back up 10 days later since I am traveling so much passing by that area.
What the Visible Light + Ha gives you compared to some Astro conversions that are just allowing Ha through, is that I can still image the ground layer and have it look good without resorting to composites. What Spencers conversion does is basically open up the top end and allow more Ha to be captured. A normal nonconverted camera does allow a little Ha (red) in, but typically the wave lengths get cut off right at that Ha point. The Visible Light + Ha allows the visible light we normally see and just expands it to allow more of the Ha.
Now it does affect the White Balance so this Z6II now runs with a custom WB that is close to the WB for Tungsten. When converting the captured Raw you have to then correct that to get the correct WB, kind of like when using an Infrared camera.
I did get to finally test the converted camera and I ran my other Z6II that isn't converted next to it. They both used the Viltrox 16mm f1.8 (yes I have 2 of them") ). I was traveling and got clear skies at the Great Sand Dunes National Park in Colorado on Thursday night. I set up just south of it near Zapata Falls. So I set both cameras up next to each other and set them up with similar compositions and settings. Which was f1.8, 20 secs, and then since I was shooting with a near full moon, I put them in Auto Iso so that the cameras could change the exposure during the night, with the moon finally setting a little after 3am.
). I was traveling and got clear skies at the Great Sand Dunes National Park in Colorado on Thursday night. I set up just south of it near Zapata Falls. So I set both cameras up next to each other and set them up with similar compositions and settings. Which was f1.8, 20 secs, and then since I was shooting with a near full moon, I put them in Auto Iso so that the cameras could change the exposure during the night, with the moon finally setting a little after 3am.
What I am going to post is images from both cameras, and then a 100% crop. I couldn't apply the exact same setting since the originals look so different. But I did edit them to look similar. Both, just had simple processing, no masking, just global adjustments in ACR.
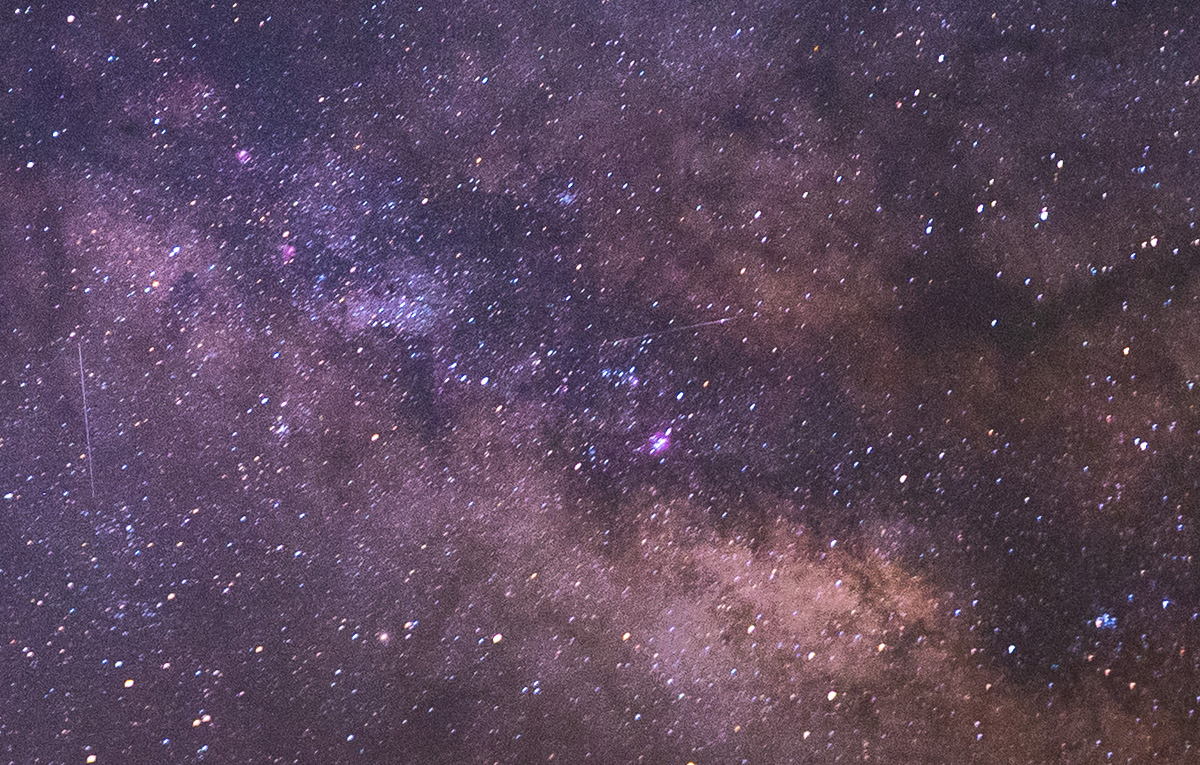
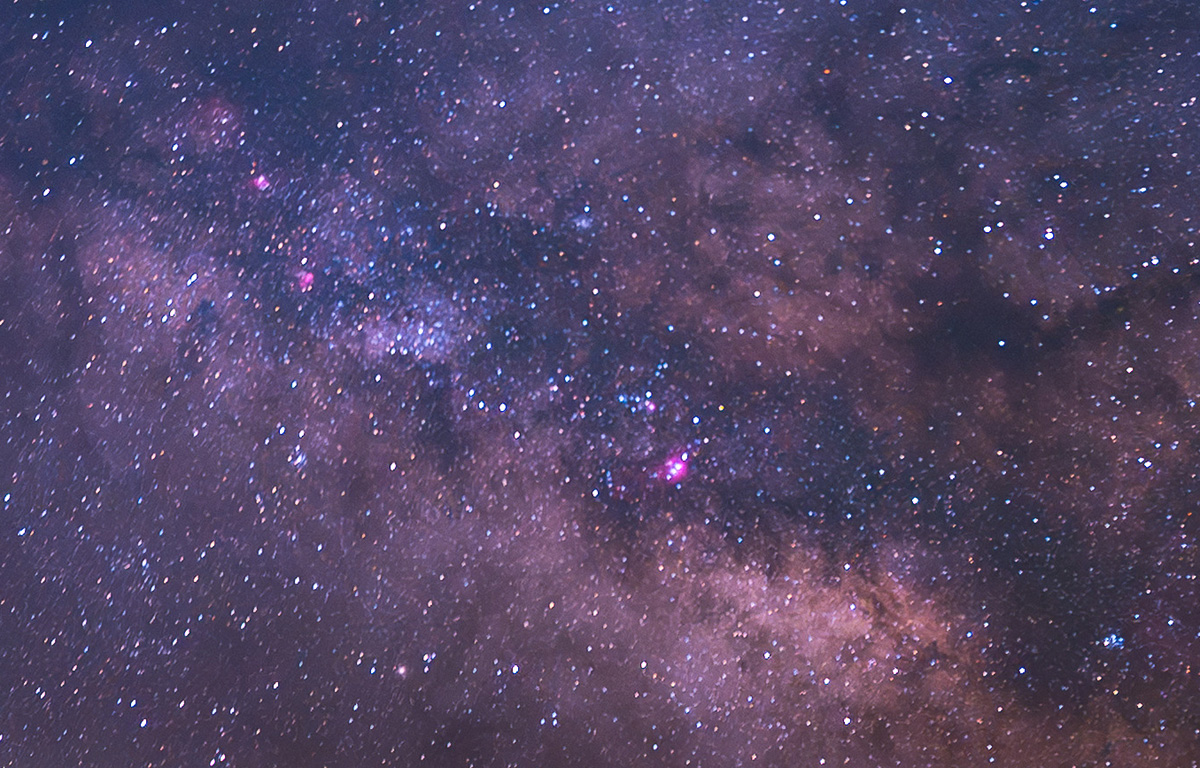
I had thought the Astro converted images would pop with the MW even more, when zoomed in to 100% you can see the Ha is captured more in the Astro converted camera, but since I am using a 16mm lens, the nebulas are pretty tiny. If had I used a 24 or 35mm or even an 85mm which is very popular with the Milky Way guys who track and stack, the differences might have been more pronounced. Most of those guys use a 12nm Ha clip in filter by Astronomiks. Since my goal is single images for timelapses, I can't go that route, but Astronomiks makes a Light Pollution filter that is very similar to the Broadband filters used for capturing Galaxies. It's in my mind to go that route, but the filter is $300 so I will wait on it for a while.
I am sharing this mainly to document my journey with the Astro converted camera, but also to document it for others who might be interested. At this point, I think there is only a marginal difference between the two. And for my Milky Way timelapses I am not sure it's gaining me what I had hoped. Though perhaps during the New Moon, when there is none of the moon going on, maybe the Astro conversion will have a bigger gap in perfomance.
The biggest difference between them is the White Balance. For anyone who has done any Milky Way photography, you know how much the look can change with just the slightest Hue and Tint adjustments. So bear in mind that the actual colors does have some variance. My goal is to adjust it so that there is some blue to the sky, but not so much blue that the stars all become blue. When that happens, you know you went too far.
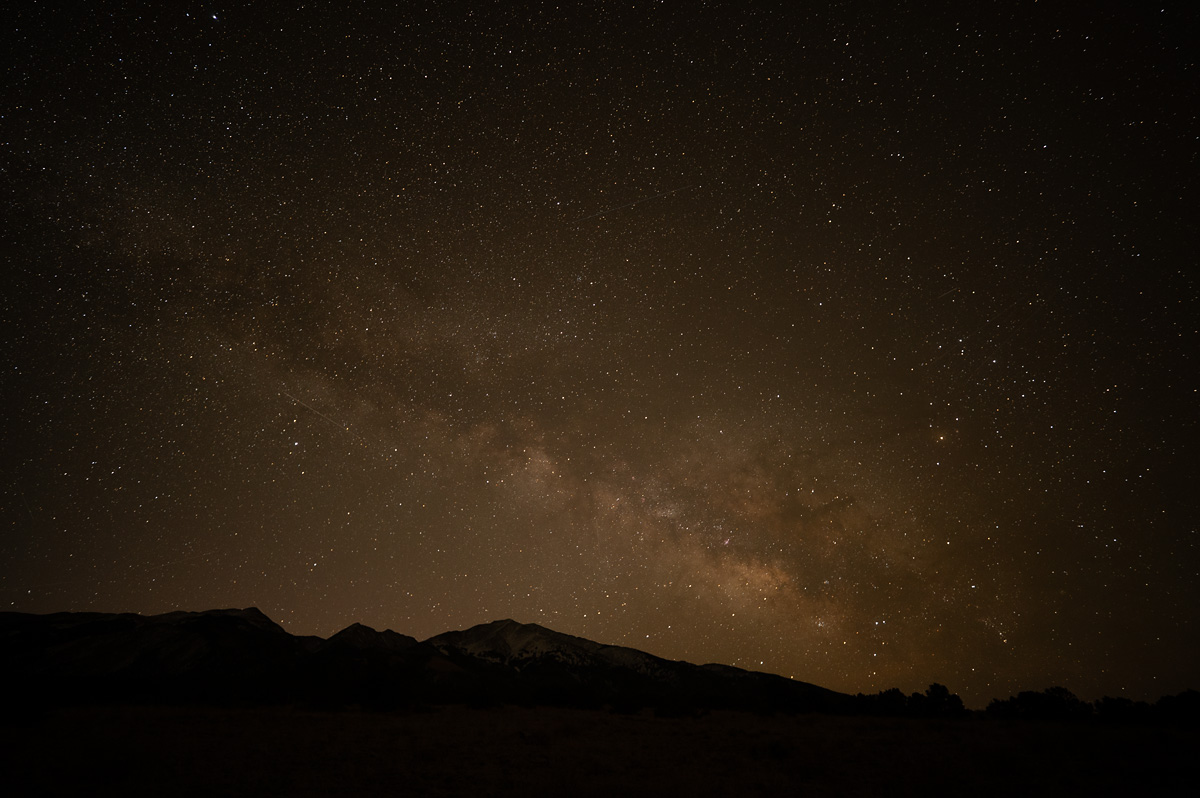
#1 - Normal Z6II
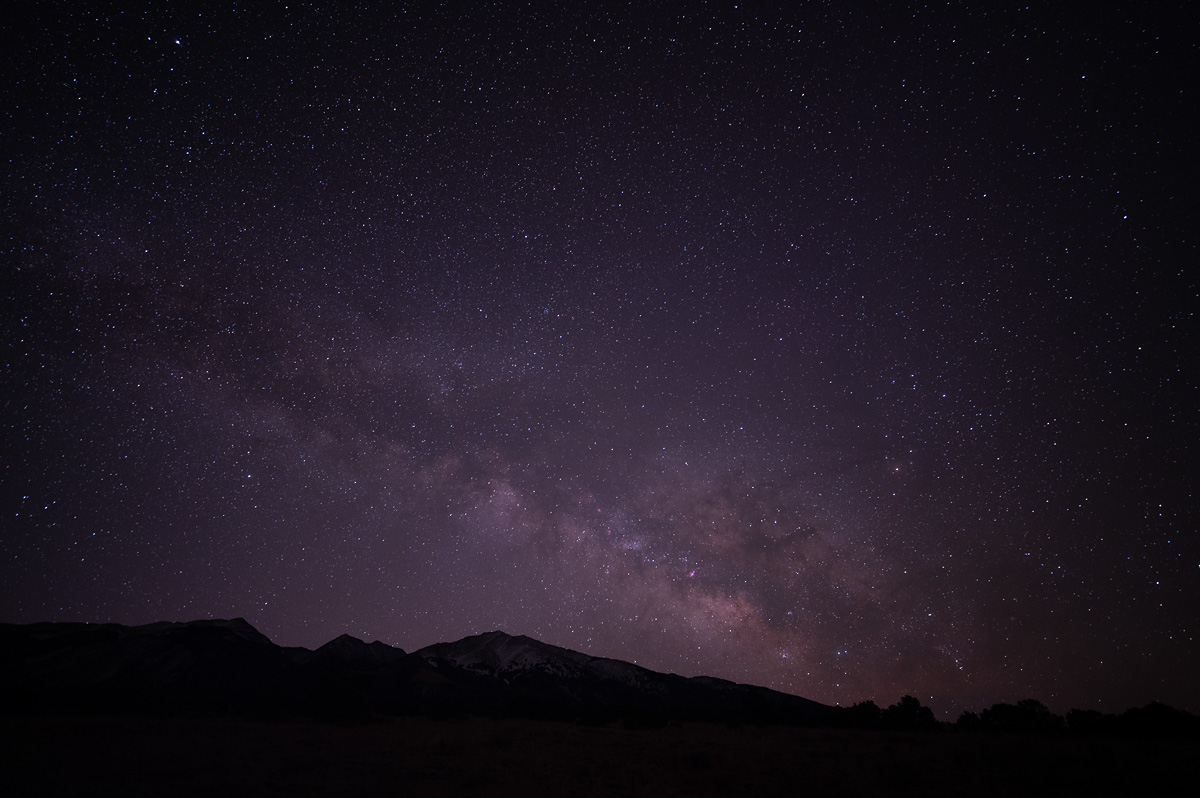
#2 - Astro Z6II
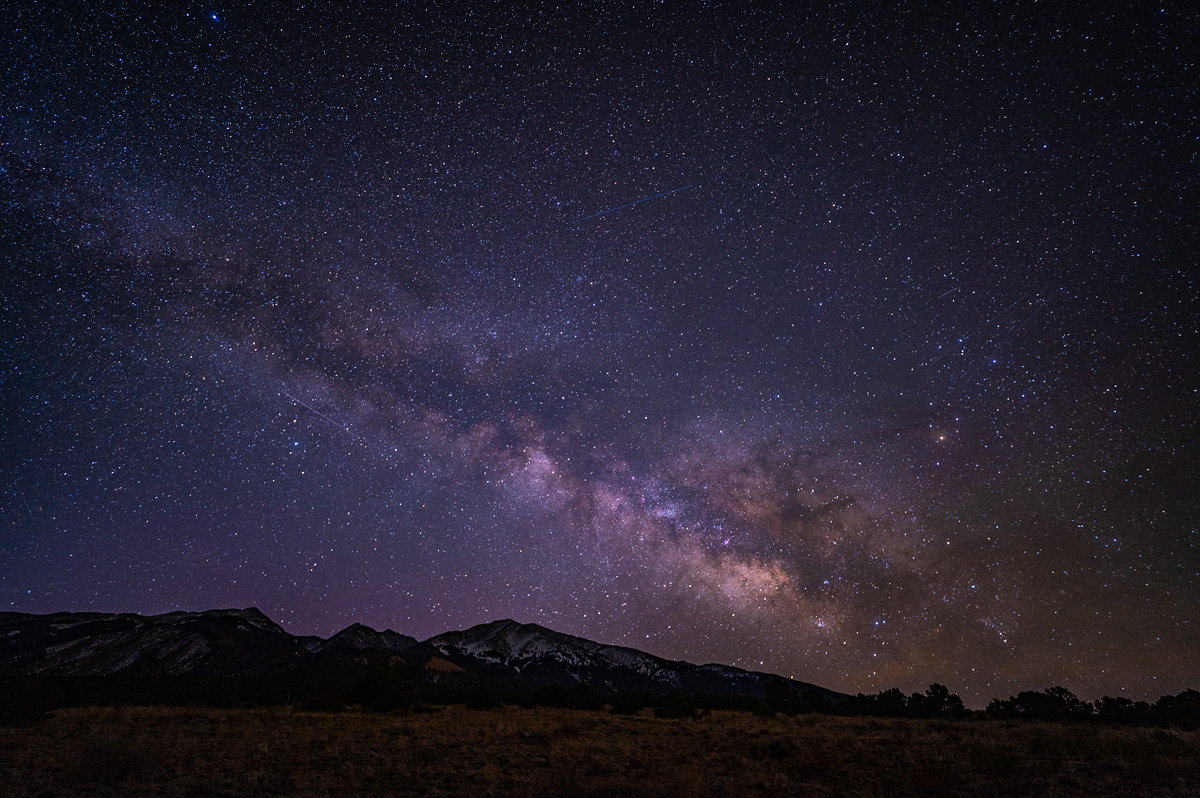
#3 - Normal Z6II with basic editing
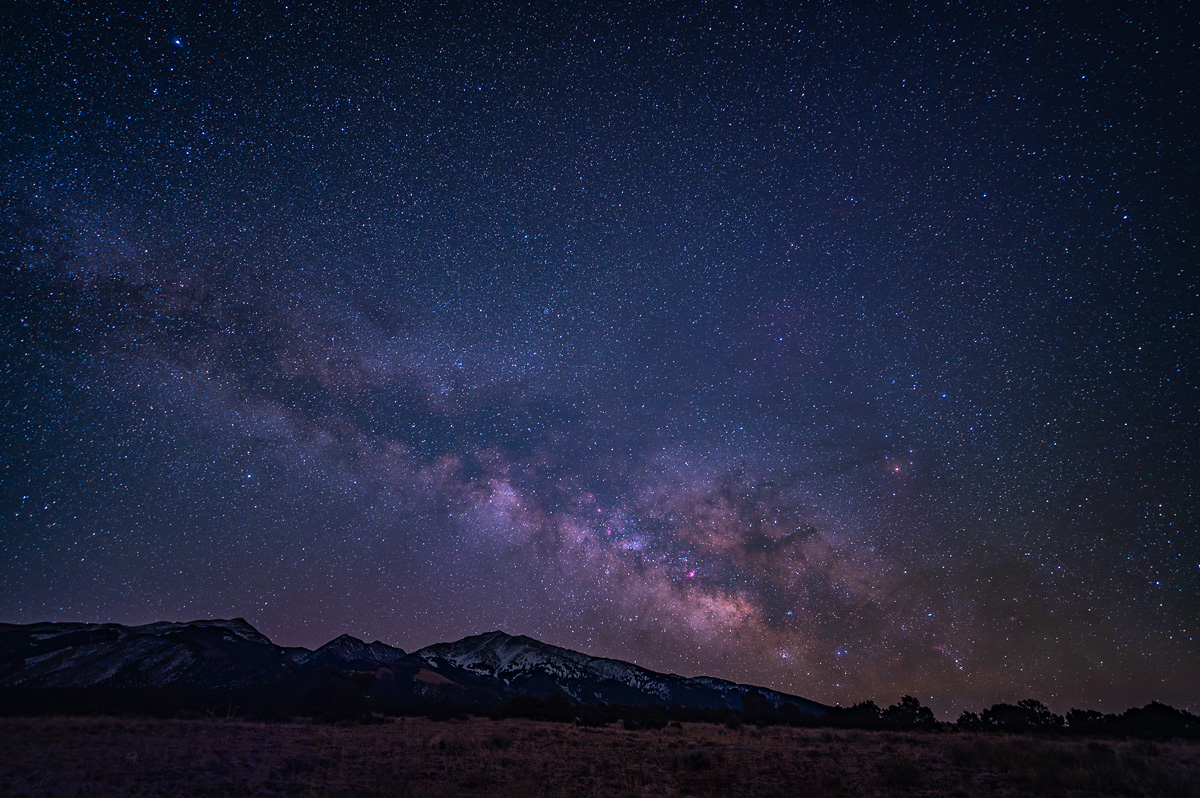
#4 - Astro Z6II with basic editing
#5 - Normal Z6II cropped to 100%
#6 - Astro Z6II cropped to 100%
While I can do that, I prefer to stick mainly to just single images that I then use in my timelapses. What I was hoping with the Visible Light + Ha conversion by Spencers was to just get a little extra pizzaz in my Milky Way timelapses.
I have done research and contemplated this for almost a year, and I finally pulled the trigger a month ago. One thing I will say is that Spencers Camera seems to have done a great job, they were quick and easy to deal with. They are located just south of Salt Lake City, so I actually dropped the camera off and then picked it back up 10 days later since I am traveling so much passing by that area.
What the Visible Light + Ha gives you compared to some Astro conversions that are just allowing Ha through, is that I can still image the ground layer and have it look good without resorting to composites. What Spencers conversion does is basically open up the top end and allow more Ha to be captured. A normal nonconverted camera does allow a little Ha (red) in, but typically the wave lengths get cut off right at that Ha point. The Visible Light + Ha allows the visible light we normally see and just expands it to allow more of the Ha.
Now it does affect the White Balance so this Z6II now runs with a custom WB that is close to the WB for Tungsten. When converting the captured Raw you have to then correct that to get the correct WB, kind of like when using an Infrared camera.
I did get to finally test the converted camera and I ran my other Z6II that isn't converted next to it. They both used the Viltrox 16mm f1.8 (yes I have 2 of them
). I was traveling and got clear skies at the Great Sand Dunes National Park in Colorado on Thursday night. I set up just south of it near Zapata Falls. So I set both cameras up next to each other and set them up with similar compositions and settings. Which was f1.8, 20 secs, and then since I was shooting with a near full moon, I put them in Auto Iso so that the cameras could change the exposure during the night, with the moon finally setting a little after 3am.What I am going to post is images from both cameras, and then a 100% crop. I couldn't apply the exact same setting since the originals look so different. But I did edit them to look similar. Both, just had simple processing, no masking, just global adjustments in ACR.
I had thought the Astro converted images would pop with the MW even more, when zoomed in to 100% you can see the Ha is captured more in the Astro converted camera, but since I am using a 16mm lens, the nebulas are pretty tiny. If had I used a 24 or 35mm or even an 85mm which is very popular with the Milky Way guys who track and stack, the differences might have been more pronounced. Most of those guys use a 12nm Ha clip in filter by Astronomiks. Since my goal is single images for timelapses, I can't go that route, but Astronomiks makes a Light Pollution filter that is very similar to the Broadband filters used for capturing Galaxies. It's in my mind to go that route, but the filter is $300 so I will wait on it for a while.
I am sharing this mainly to document my journey with the Astro converted camera, but also to document it for others who might be interested. At this point, I think there is only a marginal difference between the two. And for my Milky Way timelapses I am not sure it's gaining me what I had hoped. Though perhaps during the New Moon, when there is none of the moon going on, maybe the Astro conversion will have a bigger gap in perfomance.
The biggest difference between them is the White Balance. For anyone who has done any Milky Way photography, you know how much the look can change with just the slightest Hue and Tint adjustments. So bear in mind that the actual colors does have some variance. My goal is to adjust it so that there is some blue to the sky, but not so much blue that the stars all become blue. When that happens, you know you went too far.
#1 - Normal Z6II
#2 - Astro Z6II
#3 - Normal Z6II with basic editing
#4 - Astro Z6II with basic editing
#5 - Normal Z6II cropped to 100%
#6 - Astro Z6II cropped to 100%
Last edited: