Tips and suggestions on how to get those sharp detailed photographs of birds you have seen from other Photographers.
Although I was a serious amateur bird photographer from 2004 until around 2011, I never considered myself first rate. I sort of gave it up in 2011 when I moved to Utah and away from the bird sources I had so painstakingly learned. Technique gear and taste has probably evolved in the last 5 years so this will be basic. I am a Canon guy so you will need to translate the gear recommendations to your favorite brand.
Essential gear:
Starting out:
Bird education:
The ideal image:

Although I was a serious amateur bird photographer from 2004 until around 2011, I never considered myself first rate. I sort of gave it up in 2011 when I moved to Utah and away from the bird sources I had so painstakingly learned. Technique gear and taste has probably evolved in the last 5 years so this will be basic. I am a Canon guy so you will need to translate the gear recommendations to your favorite brand.
Essential gear:
- Lenses:
- You can start with a 70-200 and any DSLR to see if you like it. You will want at least 400 for serious work and with a 1.4X extender be at 560 which is getting long enough for some very decent work. If you get really serious, you will crave a 500 or 600 F4, or one of the better zooms. Like 200-500. I am currently happy with a Canon 100-400 f5.6 Mk2 and a 1.4X. The big advantage of the high end fast lenses is that the lower aperture isolates the subject better. Some people like the DO lenses. IS is very useful for handholding..
- Everyone starts wanting a super long lens eventually, like a 500 or a 600 with a 2X or even an 800. But I have shot a 500 with a 2X and never liked the results. Atmospheric affects will reduce the clarity and sharpness after a certain distance. Learn stealth to get closer. Save the really expensive lenses until you are sure this is your vocation. Long lenses do hold value however, I sold my 500 for more than I paid for it after 8 years of using it.
- Cameras:
- What is most beneficial to bird photography is fast accurate focus, good tracking good high ISO performance and high pixel density. You will end up cropping most images so noise is amplified and the more clean pixels you have left after cropping, the more detail that can be captured. The only real advantage of full frame is that it’s easier to find the bird in the viewfinder and when a big bird like an eagle is close, you don’t cut off the wings.
- Back in the days of 20D’s, poor AF, noise and low pixel density and slow speed was a problem. Most modern cameras will work nice. My 5DSR with a 100-400mk2 gives results that are superior to what I could get with a 1DS3 and 500 f4.
- Burst rate. For most uses 6 IPS is sufficient especially for beginners.
- Tripods/support
- For still photography a good tripod is good to have. If you want to do birds in flight (BIF) you will need a gimbal head to go on your tripod. But surprisingly you will find shooting handheld is also very effective. The reason is that the shutter speed needs to be so high for most subjects that camera shake especially with IS is not much of a problem I will cover shutter speed later. Good technique is important, but is a subject of its own and beyond the scope of this article.
- Some bird sanctuaries do not allow you to leave your car, or it is not practical because of lack of parking. But your vehicle makes an excellent blind. Birds that may run from you when outside the vehicle may ignore you when you are inside. Be sure to turn off the engine to reduce shake and prop the camera against the window sill. A beanbag is a great substitute for a tripod.
- Never shoot over the hood of your car, or over black asphalt, the heat waves will badly distort the atmosphere and the long lens will amplify the effect.
Starting out:
- Try shooting songbirds at your home, or a local park. Ducks are another good subject that can usually be found in urban areas at parks or waterways. Seagulls at the beach are also good subjects. Tracking airplanes at the local airport is good practice for hand held tracking.
- Always try to have the light at your back and shoot when the sun angle is low. The first 2 hours after sunrise or before sunset are best. Light is always an issue, so dark days are difficult. Too much light will cut contrast.
- For yellow or red birds, a full red sunrise at the first instant is enough to blow the red and yellow channels. A slightly overcast day is actually better.
- Higher shutter speed than you expect is often required. A perched song bird that is singing may seem motionless but the vibrating beak may need a shutter speed of 1/250 or more to freeze it. Large birds like owls or eagles will remain perfectly still but the feathers may ruffle in a slight breeze.
- I generally start at 1/250 for tripod work of a perched bird and more if the light allows.
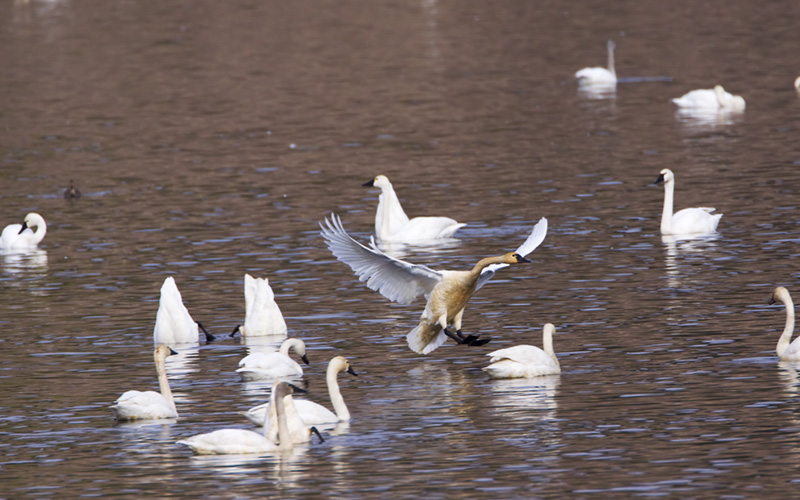
- 1/1250 or 1/1500 is my preferred shutter speed for BIF, either hand held or tripod mounted. This eliminates the effect of subject motion and camera shake. Remember to turn off IS if you are using a tripod.
- There is hardly any reason with modern cameras to shoot lower than ISO400, and for my 5DSR which is not known to be a great high ISO camera, I still go up to ISO3200 with confidence. ISO 800 was tops for my 1DS3.
Bird education:
- Finding birds in ideal settings and time of year and light is the biggest learning curve. But one that does not require much more than time and effort.
- Start with a good field manual. I use Petersons Western Birds by Roger Tory Peterson. Of course get the edition for your zone. It will help identify the birds in your area and tell you about their habitat and what time of year they will be in your area,
- Learn the seasons for the birds. Mating season (spring) is great for many birds as they have exceptional color and habits during mating.
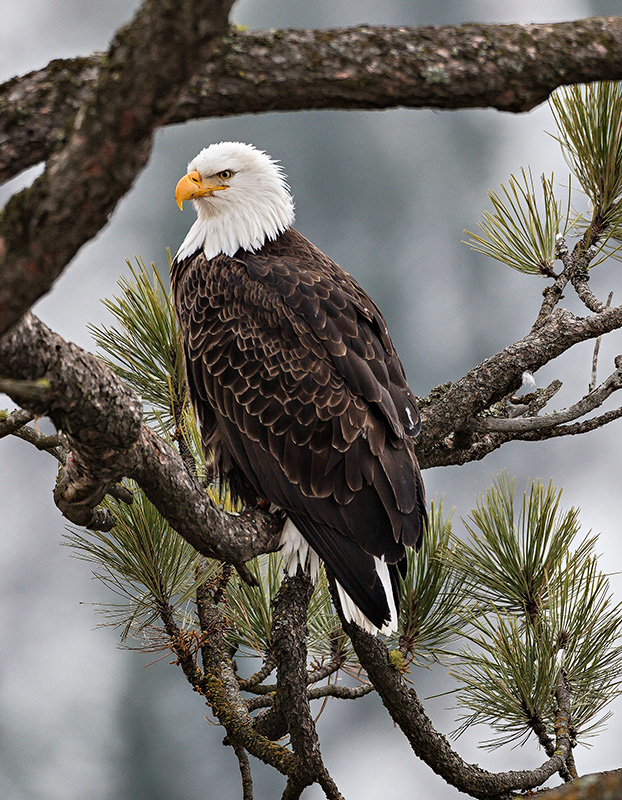
- Winter feeding is another good time, for example cedar waxwings will arrive in winter to feed on mountain ash berries in great flocks. Eagles hang out where fish can be had, like below a dam discharge or where salmon spawn and die.
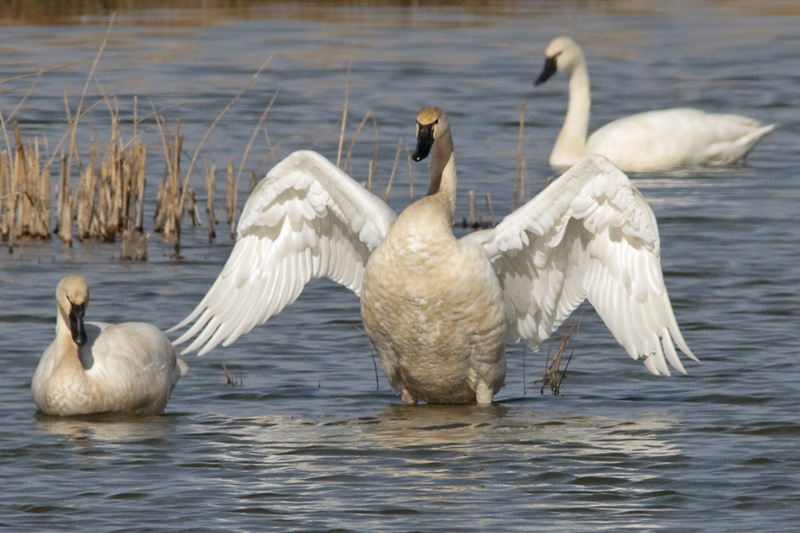
- Migration can bring huge flocks along the flyways and is a marvel to see. I have seen 500 or more tundra swans in a 5 mile stretch in early spring in North Idaho.
- Avoid disturbing nesting birds, eagles and Great blue heron will abandon the nest if people approach too close. If not this year, the next.
- Feeding eagles can be approached very closely while nesting eagles will become very agitated.
- Contact local bird clubs for more info. You need to learn where they are, and they will know.
The ideal image:
- A few basic tips about what is considered a good image.
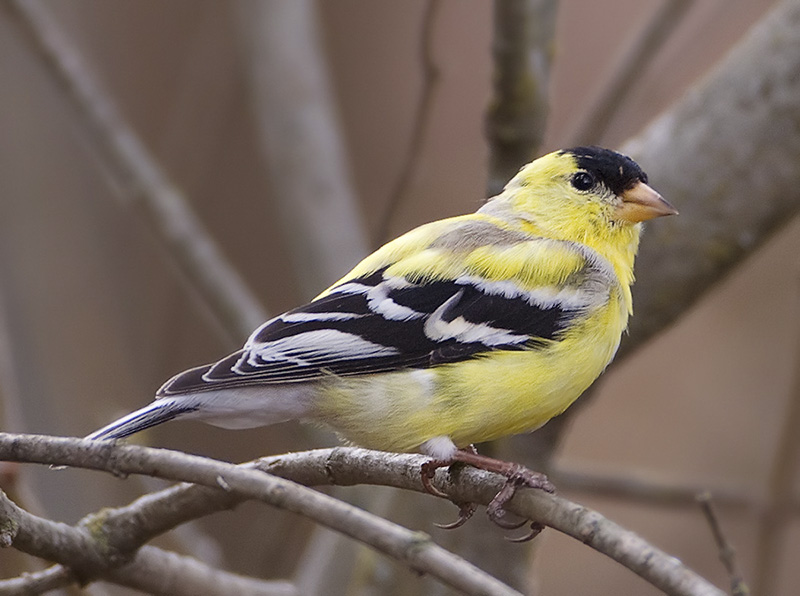
- Try to have the eyes in sharp focus and with catch lights.
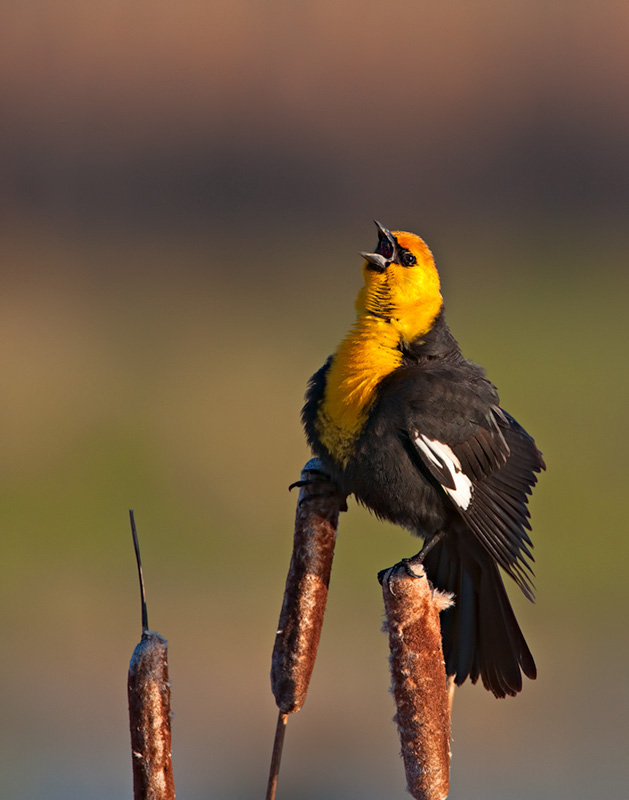
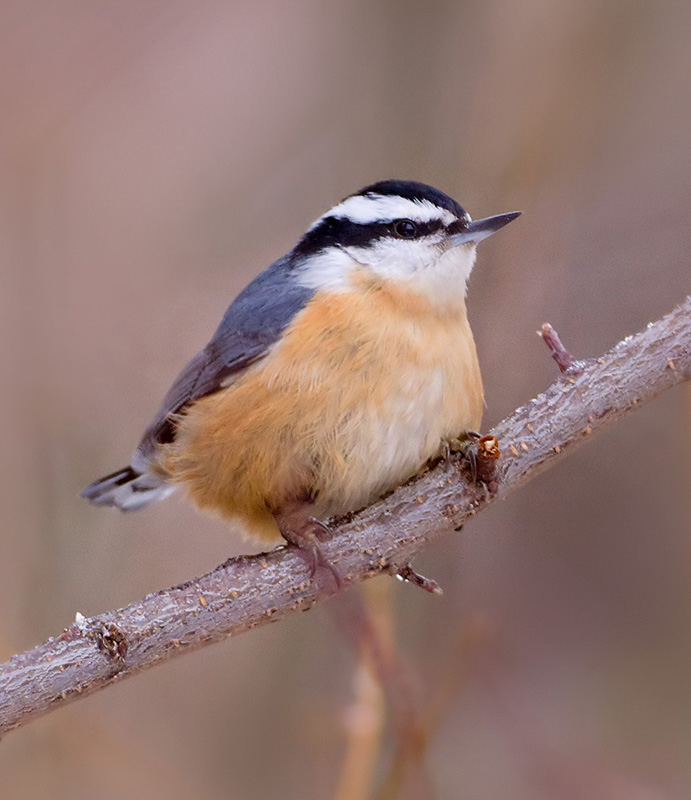
- Side views are best for non predators which typically have eyes on the side of their heads. Front views are better for predators like owls and eagle with eyes looking forward.
- The eye of the bird ought to be near the 2/3 point in the frame. In horizontal images, put more room in front of the bird than behind it.
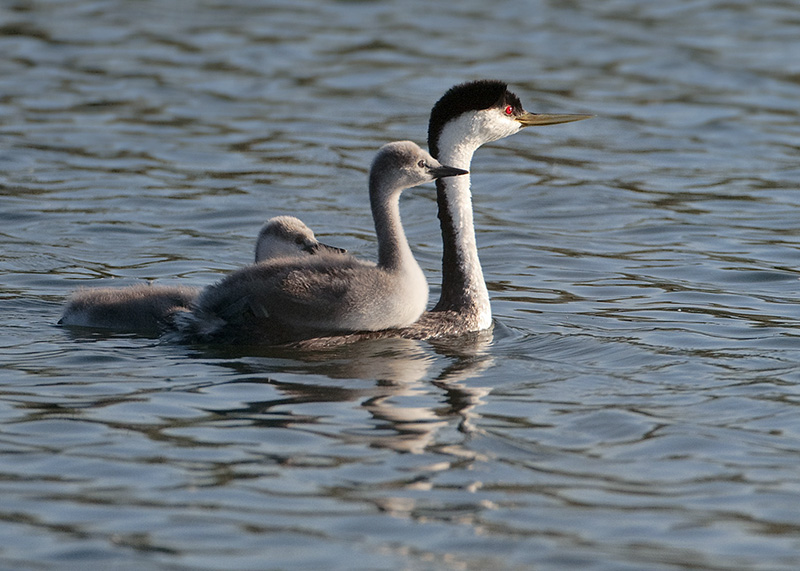
- Low angles are best for swimming or wading birds. And steep upward angles are often all you can get for perched or flying birds, but try to reduce this as much as possible. Sometimes a high vantage point will help.
- Try for behavior shots if possible. The moment an eagle grabs a fish, or a singing bird in full song, a Great Blue Heron with a fish in its beak are examples. Grebes carrying their young on their backs.
- Good feather detail is something that is always looked for by the pixel peeper crowd. As is good exposure, clear clean water, lack of obstructing branches etc.
- Subject isolation is always good, a shallow dof with a clean background works best. This is where the expensive lenses stand out.
- My wildlife gallery has a few examples.
- Most serious bird photographers will read books by Arthur Morris and perhaps visit his web site “Birds as Art”.
Last edited by a moderator: